EZ MSP Blog
Tip of the Week: How to Save Your Keyboard from a Drink-Spillage Nightmare
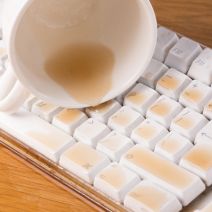
 It’s a best practice to avoid placing drinks and food near the computer, but for the busy business owner, this practice is often ignored in preference to getting more work done. While it’s typically extremely unhealthy to forsake your lunch break to continue working, some workers might feel that it’s impossible to get all of their work done without doing so. Inevitably, this leads to everyone’s worst nightmare: spilling a drink, most likely coffee or some kind of soda, on your keyboard.
If you’ve ever tried to clean your keyboard following a spill, you know it can be a frustrating and time-consuming process. Here’s how to best approach cleaning your keyboard following a spill.
The first thing you’ll notice is that it’s awfully hard to Google the phrase, “How to clean soda off my keyboard,” when there’s liquid seeping deeper and deeper into the recesses of your keyboard. A sugary substance will be especially bad for your keyboard, making the keys stick and rendering it useless. Instead of worrying about how you’re going to fix this issue, be sure to bookmark or print out this five-step action plan for cleaning your keyboard following a spill.
Power Off Your Computer and Disconnect the Keyboard
First of all, you should make every effort to ensure that you power down your computer as soon as possible, and disconnect the keyboard. Most modern keyboards are USB-connected and can easily be disconnected, but older keyboards have the round connector, which could cause damage to the motherboard if removed without powering down the machine first. Act quickly, because if the liquid seeps into the keyboard’s circuits, it could cause even more problems (unlike Coca-cola’s spilt-soda-on-computer scenario).
Flip the Keyboard Upside Down and Give it a Good Shaking
While it makes sense to go rummaging for a towel immediately following a spill, this time should instead be devoted to flipping the keyboard over and giving it a good shaking. This helps to keep the liquid that has gotten into the keyboard from seeping in too deep.
Wipe Down Your Keyboard
Letting the liquid flow out of your keyboard is a crucial first step, but it won’t solve all of your problems. Use a dry cloth to wipe up your mess, and try your best to get between the keys. Don’t take any keys off quite yet. Focus on cleaning rather than detailing.
Let it Dry Overnight
Next, find a dry place to let your keyboard sit upside down overnight. When you come back to it the next day, look for any additional moisture that may be left and give it a wiping.
Check for Stickiness
Before plugging your keyboard back in, test it one last time for stickiness. If you spilled a sugary drink like soda, you’ll probably still run into some trouble, regardless of how well you cleaned it up. Depending on how bad it is, you may have to remove the keys and clean underneath them. Computer Hope has some suggestions concerning how to do this:
Removing a standard keyboard key is simple. Start by pressing down on the key in front of the key you want to remove and insert a flat object such as a car key... or a small flathead screwdriver below the key. Once below the key twist it or push down until the key pops off. If you want to remove more than one key, repeat this process until all keys are removed.
After carefully removing the keys, use a Q-tip to finish the cleanup. With the keyboard now completely cleaned, plug it in and see how it works. If you caught the accident before it could cause too much damage, you might have been able to save your keyboard. If the spill was too large, your keyboard is probably a hopelessly sticky mess. You won’t know if this is the case until you sit down with your keyboard and try it out.
Stay tuned next week for even more great tips from EZ MSP.
